


Quick start
- Take a photo, taking into account recommendations

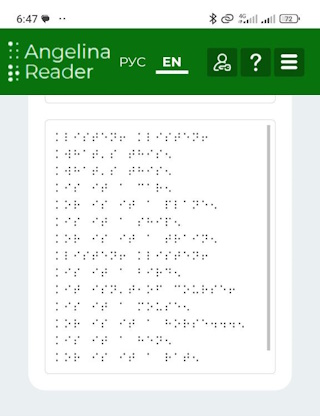
- Get the recognition results as:
- recognized text in braille characters,
- text in ordinary (flat-printed) letters,
- images with the signed meaning of each braille character.
- Read, save or send the result to email.

- teachers working with blind students,
- parents and relatives of blind people,
- any people who communicate with the blind and who need to read the text in Braille.
Android:
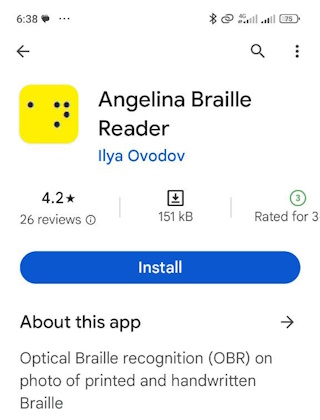
- Find Angelina Braille Reader application on Google Play
- Press the button "Install"
Android. Alternative way:
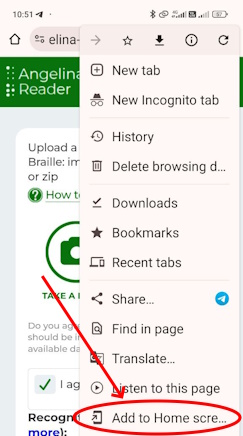
If Google Play is not installed on your device- Open Internet site Angelina Braille Reader: angelina-reader.com
- Select "Add to Home Screen" option in Chrome browser menu

iPhone:
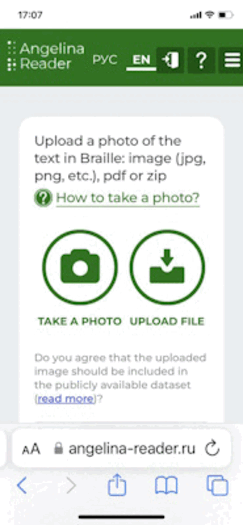
- Open Internet site Angelina Braille Reader: angelina-reader.com
- Press
 "share" button
 - In the list of options, select "Add to Home Screen"
- In the form that appears, click "Add"
- First of all, you will be able to view previously uploaded texts. Since these are your personal texts, you have to protect them with a username and password;
- You can do default settings, so as not to choose the operating mode every time;
- You can revoke permission to publish previously uploaded materials after they have been uploaded and decrypted;
- Unregistered users cannot prohibit the public distribution of uploaded texts.
If necessary you will be able to cancel registration in the system and completely delete the information stored in your account.
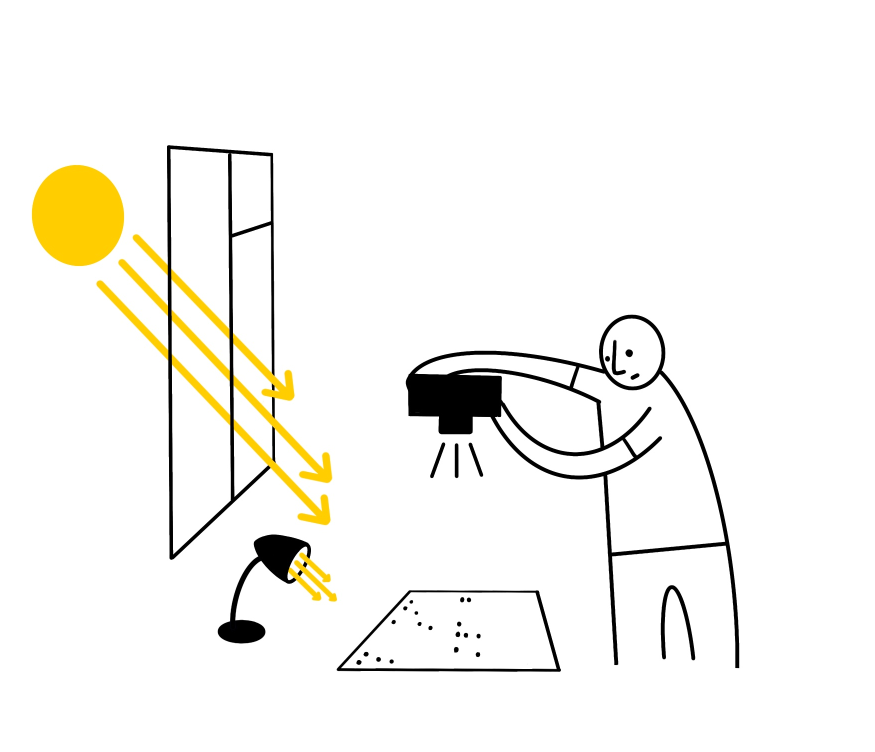
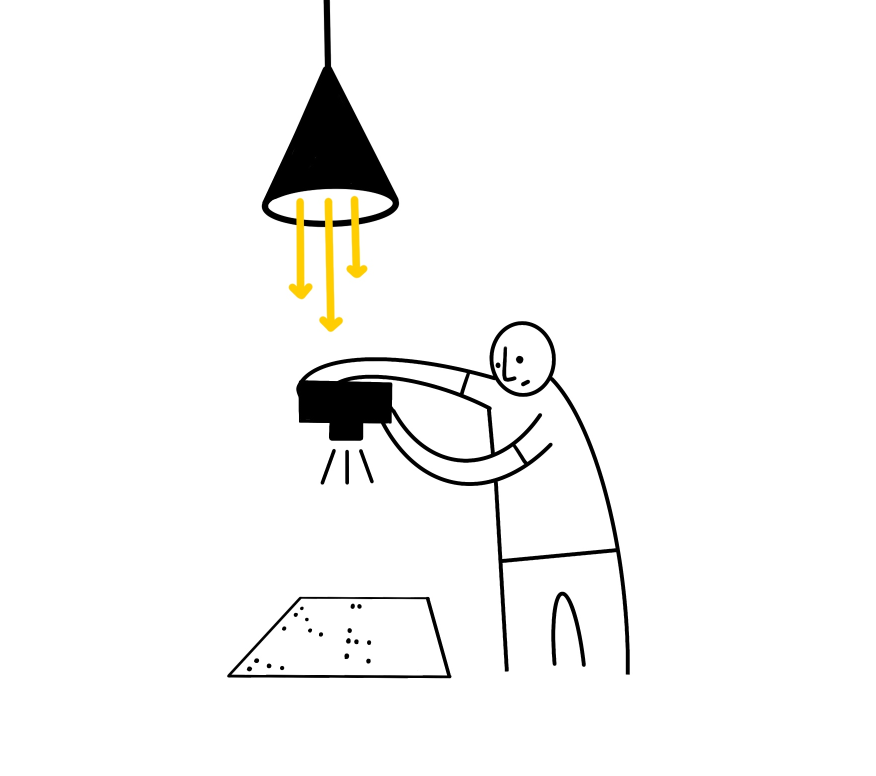
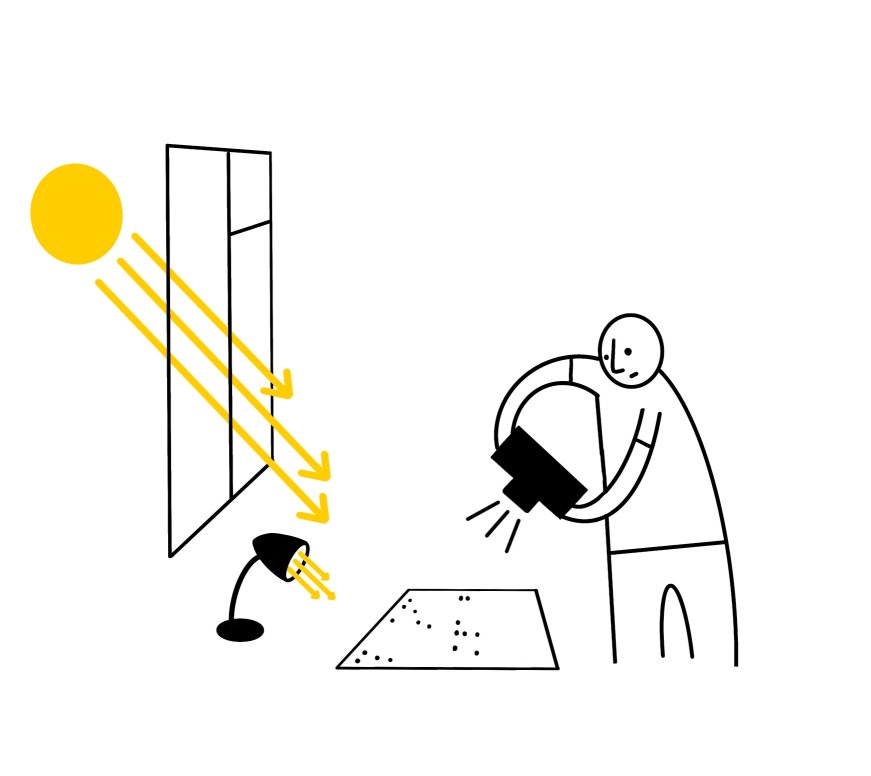
- the light should fall from the (upper) side of the sheet farthest from you and give a contrasting image of points with light and shadow.
- The sheet should be photographed from above.
- The image scale is such that the A4 sheet occupies almost the entire frame.
- Resolution of at least 1000 points vertically and horizontally (photos from most smartphones and cameras are suitable).
User's Guide
- when starting from a smartphone - a photo taken with the camera directly from the program;
- a photo taken in advance (a file with an image of the type *.jpg, etc.);
- file in Adobe Acrobat format (file type *.pdf, obtained, for example, from a scanner);
- archive in *.zip format containing images. To get an archive in Windows, select several files or a folder with files, right-click and select "send to - compressed zip folder";
- Consent to public access to the uploaded text or refusal from it.
- The language of the text. Determines the flat text in which the recognized Braille text will be translated.
- Auto-orientation. If this mode is enabled, the program itself determines how to rotate the sheet in the image correctly. The fact is that when you take a picture from top to bottom, the smartphone may choose the wrong orientation, the photo is turned upside down or turned on its side. The "auto-orientation" mode allows you to correctly recognize even inverted images. However, sometimes automatic orientation detection can fail. In this case, make sure that the photo is oriented correctly and disable the "auto-orientation" option. It is recommended to always select the "auto-orientation" option, except when using it gives incorrect results.
- Both sides. This is a mode that, based on the image of only one side of a sheet with double-sided printing, allows you to get text from both sides at once: front and back. However, the quality of recognition of the reverse side will be worse, therefore, it is recommended to enable this mode only when you need to quickly recognize the text for informational purposes. For a better result, we recommend taking a separate photo of each side and recognizing it separately, leaving the "both sides" mode off.
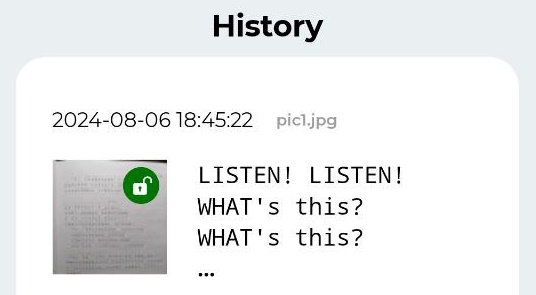
- date and time when the image (picture) was uploaded
- name of the uploaded file
- the first 3 lines of the uploaded text
- icon that shows if public access
is allowed or not
  .
.
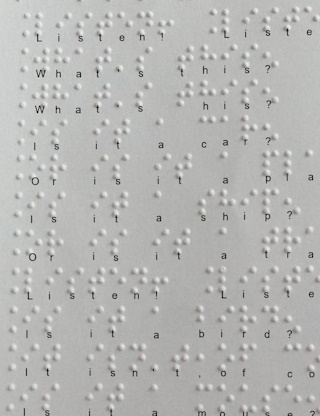
- image with letters of flat text signed under braille characters;
- recognized flat text;
- recognized braille text.
Telegram
If sending images is selected, only images will be sent. The text will not be sent.All applications
If the recognition result contains many pages and sending images is selected, the sending function may not To work: The application selection form is not displayed. In this case, to send the results, use the mail sending function. These features and limitations are determined by the applications used and the operating system of your device, We can't fix it.- password
- user's display name
- default settings for recognition modes and mail sending modes
- list of the most frequently used recipient addresses
To do this, in the "Settings" section, click on the "Completely delete the account" hyperlink at the bottom of the form.
Keep in mind: This operation cannot be canceled!
To protect against accidental deletion of your data, you will be prompted to enter the phrase "delete [your e-mail]" in the appropriate field, substituting the e-mail address with which you registered instead of [your e-mail].You can find your email address in the top line of the Settings window.
About the project
The "Angelina Braille Reader" by Ilya Ovodov is a non-profit project designed to simplify the reading of Braille texts by sighted people: teachers, relatives, friends of blind people. To read the text in Braille, just take a picture of it and upload it to the program. The project is being developed as free and open source software. If you are a programmer and want to help the project — join us